Configurating HPE FlexFabric 5700 from Factory Setting with Console
Introduction
Accidentally, the switch, HPE FlexFabric 5700, in our laboratory has been resetted back to factory setting. This gives me a chance to study how to configure a switch with serial console. Usually, a switch that just comes out from the factory may have a web management port. You just have to connect your computer to the management port with a RJ-45 to RJ-45 connector and set your network settings to Dynamic Host Configuration Protocol (DHCP). After obtaining an IP, you can search what the IP of the DHCP server is and the management webpage is right there. However, when I connect to the management port, I've only got an IP of 169.*.*.* which means the DHCP is unavailable (more possibilities can be found here). As a result, the only way to configure the switch is via serial console. The exact model of our switch is HPE FF 5700-32XGT-8XG-2QSFP+ Sw.Prerequisite
In order to connect your computer to the console port of a switch, you will need the following serveral items:- A console cable is an 8-core shielded cable, with a crimped RJ-45 connector at one end for connecting to the console port of the switch, and a DB-9 female connector at the other end for connecting to the serial port on the configuration terminal.
 (From manual)
 - A DB9 to USB cable (optional). As I don't have PC which has a DB9 port, it's necessary to prepare a DB9 to USB cable.
- A PC. In my case, I use a Mac book pro.
- Serial tool on PC. On windows, you can use putty to connect to a serial port. On mac, I use SerialTools which is free software from app store.
Setting Up Connection
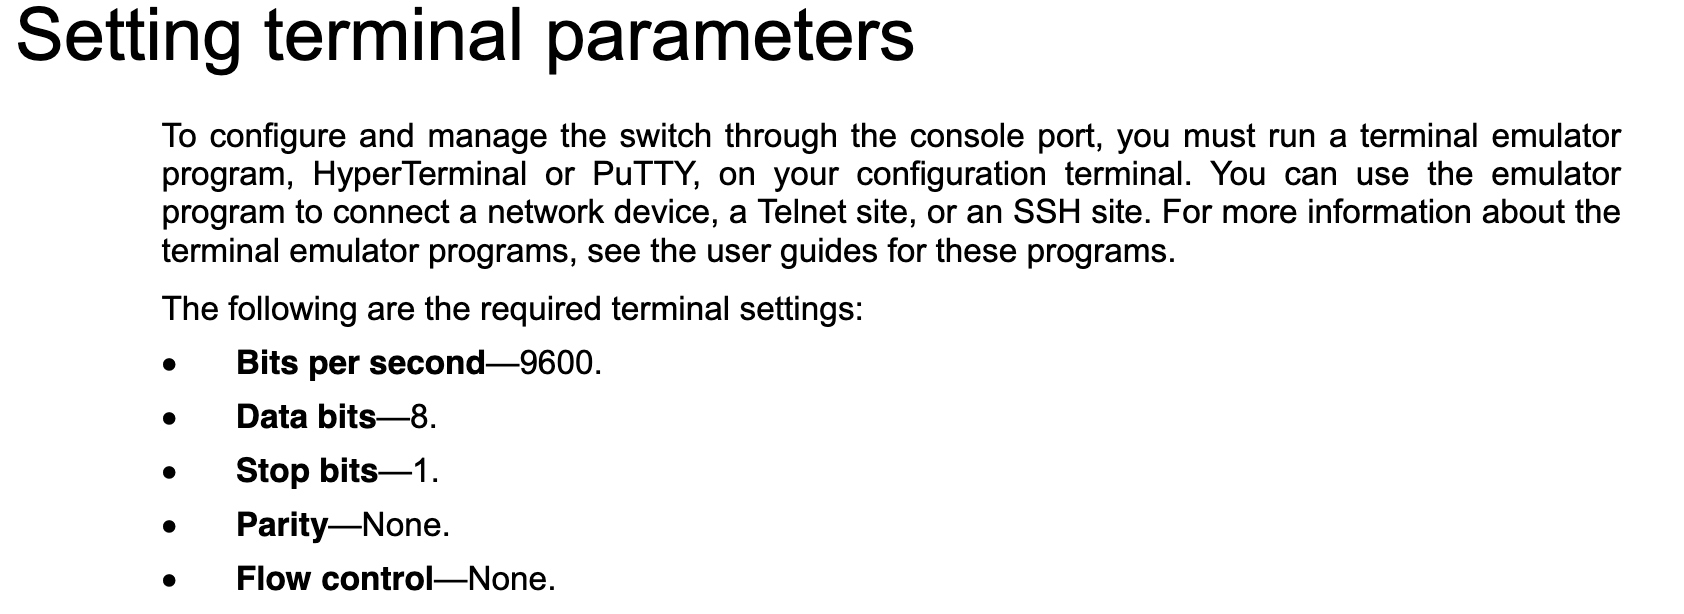
Since most of the switch doesn't have a power button, connecting the power supply means starting up the switch. Before powering up the switch, you will have to connect your PC to the console port and to configure the serial port connection on PC as the following image shows:
 (From manual)
After selecting the correct serial port to connect, the baud rate of 9600, the data bits of 8, and the stop bits of 1, you can plug in the power supply and you can see the startup of the switch as the following video. It will take several minutes.
Configurating the Switch
- At first, you will be in user view. In this view, you can view the running status and statistics of the switch. In order to configure the switch, change to system view to set the system parameters.
<HPE> system-view - So far fans might have been kept spinning up, set up a prefered direction (port-to-power or power-to-port) for fans and they should spin down.
[HPE] fan prefer-direction slot 1 port-to-power - Next, set up the management interface for ssh and https access. Replace x.x.x.x with the desired IP and y.y.y.y with the IP of the gateway.
[HPE] interface M-GigabitEthernet0/0/0 [HPE-M-GigabitEthernet0/0/0] description Management_GigE [HPE-M-GigabitEthernet0/0/0] ip address x.x.x.x 255.255.255.0 [HPE-M-GigabitEthernet0/0/0] quit [HPE] ip route-static 0.0.0.0 0.0.0.0 y.y.y.y - Add a new administrator user account for ssh and https access and replace yourpassword with your password.
[HPE] local-user manager class manage [HPE-luser-manage-manager] password simple yourpassword [HPE-luser-manage-manager] service-type ssh https [HPE-luser-manage-manager] authorization-attribute user-role network-admin [HPE-luser-manage-manager] authorization-attribute user-role network-operator [HPE-luser-manage-manager] quit [HPE] ssh server enable [HPE] ssh user manager service-type all authentication-type password [HPE] ip https enable - Set up the access line for ssh access.
[HPE] line vty 0 4 [HPE-line-vty0-4] authentication-mode scheme [HPE-line-vty0-4] user-role network-admin [HPE-line-vty0-4] protocol inbound ssh [HPE-line-vty0-4] idle-timeout 600 0 [HPE-line-vty0-4] quit - Reboot the switch and save the configuration.
reboot
While the ssh server of the switch uses an older cipher algorithm, you will have to specify the algorithm.
% ssh username@ip
Unable to negotiate with ip port 22: no matching cipher found. Their offer: aes128-cbc,aes256-cbc,3des-cbc,des-cbc
% ssh -Q cipher
3des-cbc
aes128-cbc
aes192-cbc
aes256-cbc
rijndael-cbc@lysator.liu.se
aes128-ctr
aes192-ctr
aes256-ctr
aes128-gcm@openssh.com
aes256-gcm@openssh.com
chacha20-poly1305@openssh.com
% ssh -c 3des-cbc username@ip
username@ip's password:
Here is the enabled web management interface.

History
- 29th Sep, 2020: Initial version