Laravel Homestead and Voyager on Window 10
Introduction
Recently, I've gotton a chance to update and maintain a website backed by Laravel and Voyager. While coming across the installation of development environment of Laravel Homestead, I encounter several problems. This article shows all the steps I've done to successfully run the website.1. Hardware Virtualization
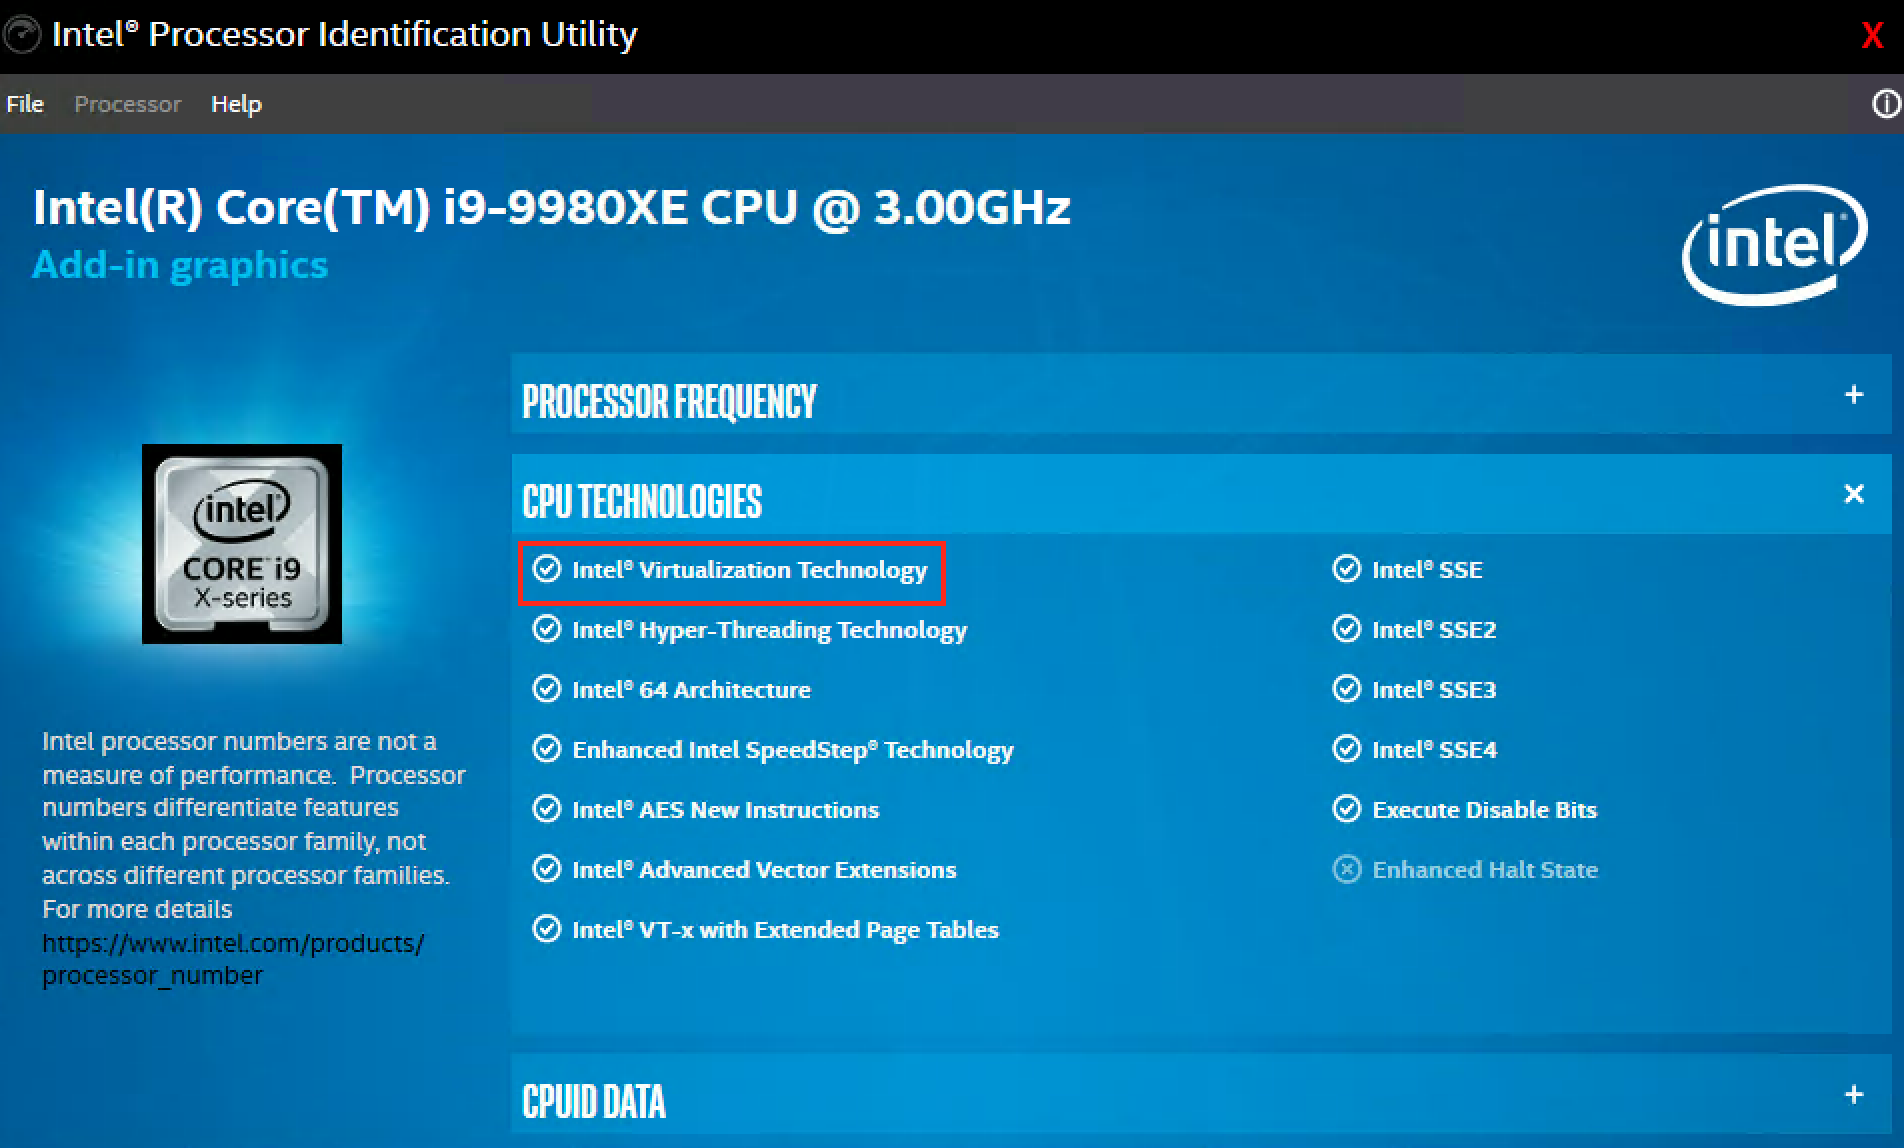
In order to run Laravel Homestead on Windows, enabling hardware virtualization is needed via tools like Intel® Processor Identification Utility or the corresponded utility for AMD CPU.
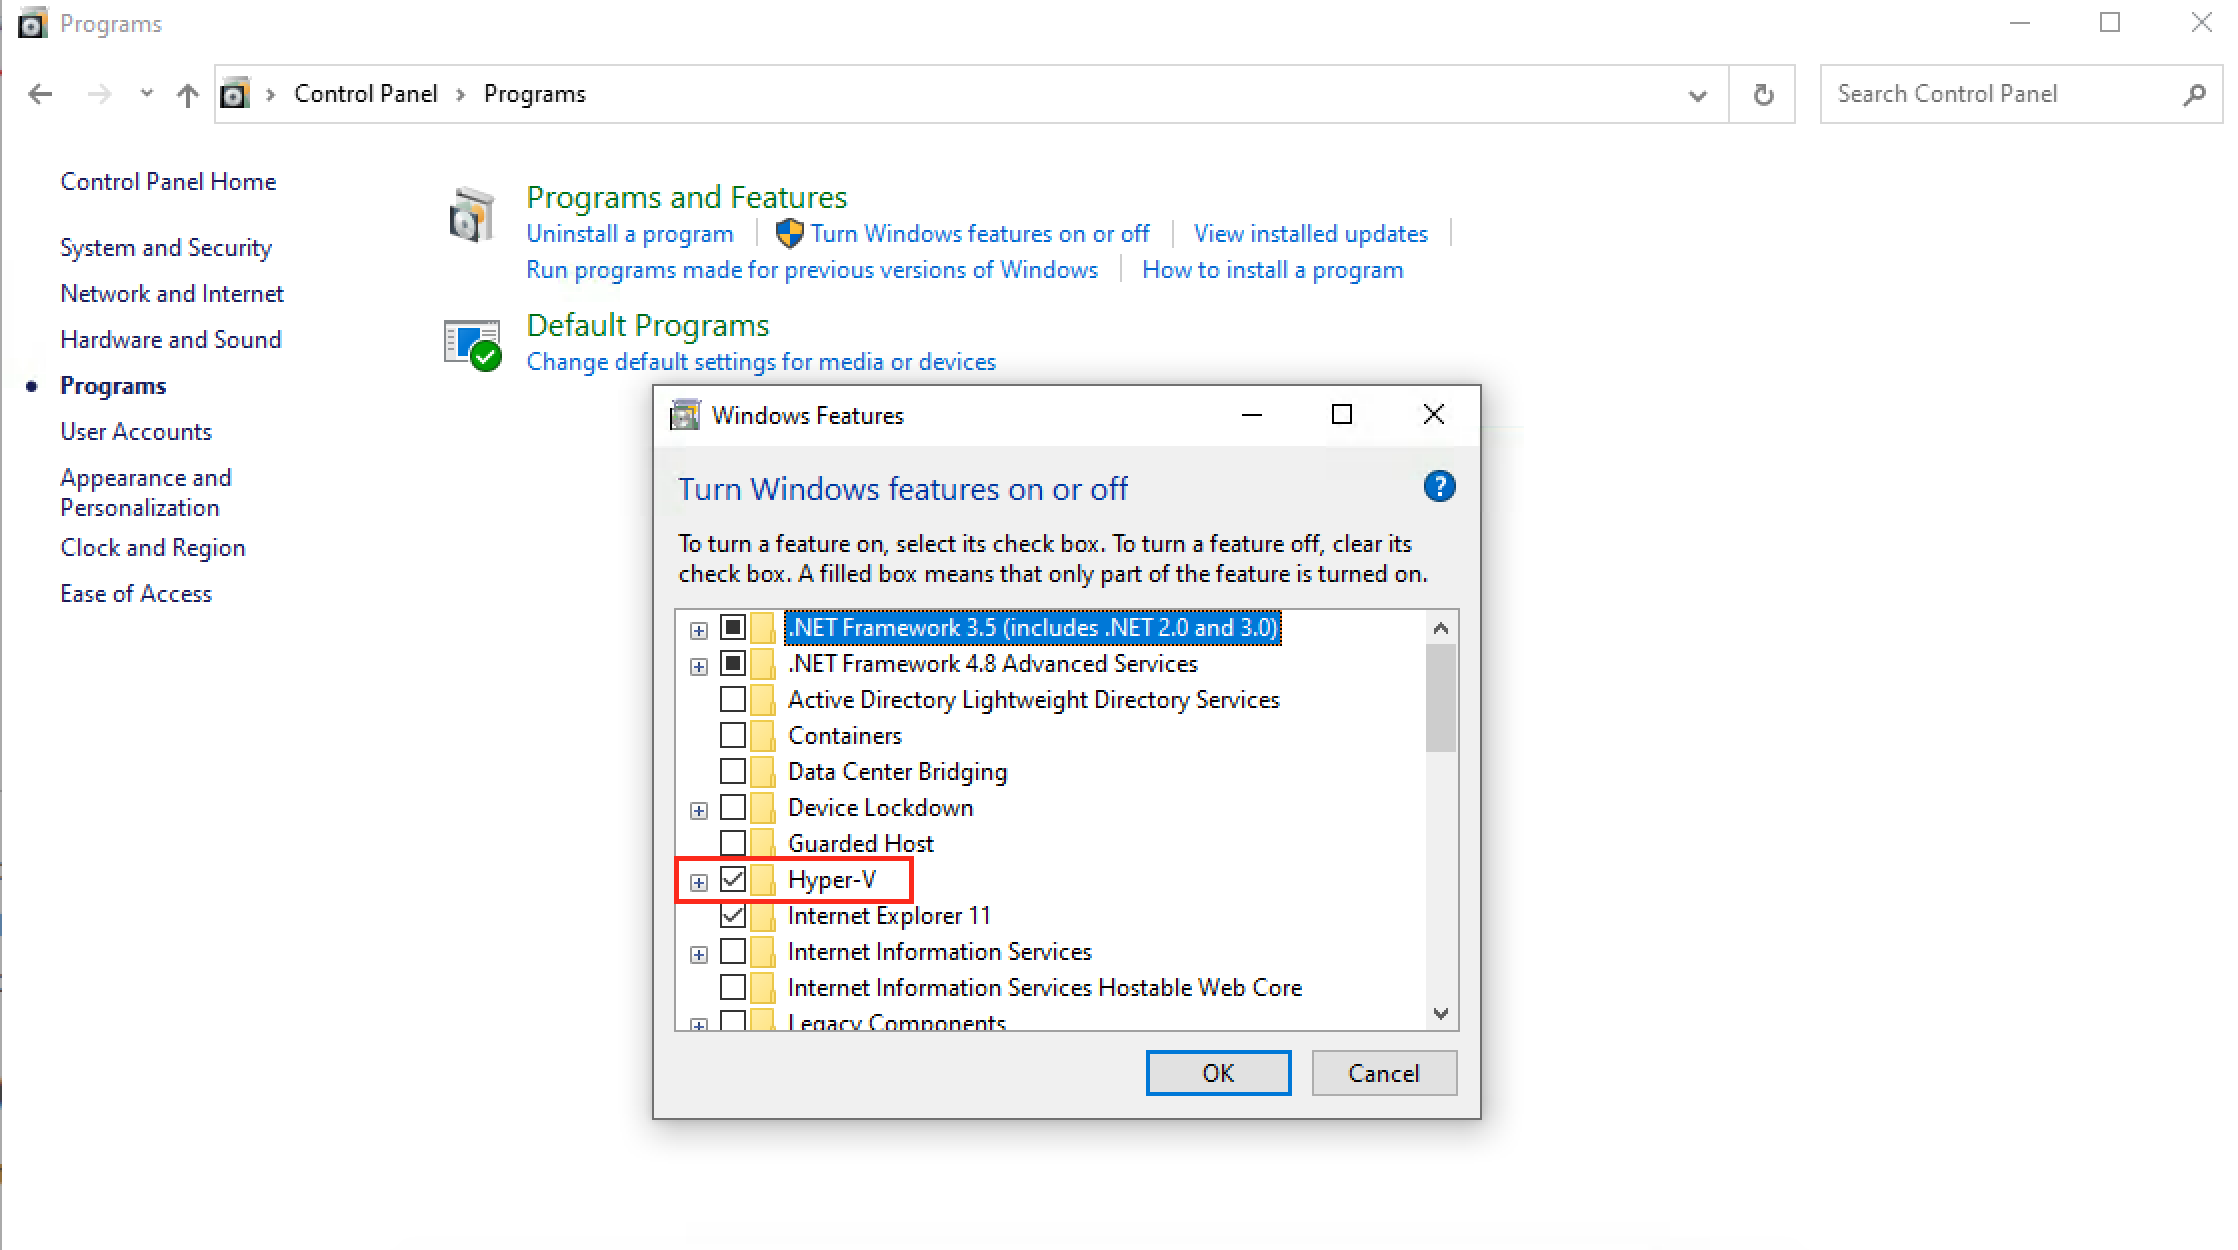
After that, Hyper-V in Window Features is required in Control Panel. You will have you restart the computer to let these changes to take place.
2. VirtualBox and Vagrant
Download VirtualBox and Vagrant and install them for the purpose of VM management.3. Git Bash
Download Git Bash and install it for the later Linux commands to be execute on Windows.4. Homestead
Open git bash and input the following command to add Homestead to your Vagrant installation.vagrant box add laravel/homesteadcd ~
git clone https://github.com/laravel/homestead.git Homestead
cd Homestead
bash init.sh5. ssh key (optional)
There is ssh-keygen tools in git bash.ssh-keygen -t rsa -C “my_email@example.com”6. Multiple php version management (optional)
In the terminal of Homestead, you can use update-alternatives to show the available php version installed.vagrant@homestead:~$ update-alternatives --display php
php - manual mode
link best version is /usr/bin/php8.0
link currently points to /usr/bin/php7.2
link php is /usr/bin/php
slave php.1.gz is /usr/share/man/man1/php.1.gz
/usr/bin/php5.6 - priority 56
slave php.1.gz: /usr/share/man/man1/php5.6.1.gz
/usr/bin/php7.0 - priority 70
slave php.1.gz: /usr/share/man/man1/php7.0.1.gz
/usr/bin/php7.1 - priority 71
slave php.1.gz: /usr/share/man/man1/php7.1.1.gz
/usr/bin/php7.2 - priority 72
slave php.1.gz: /usr/share/man/man1/php7.2.1.gz
/usr/bin/php7.3 - priority 73
slave php.1.gz: /usr/share/man/man1/php7.3.1.gz
/usr/bin/php7.4 - priority 74
slave php.1.gz: /usr/share/man/man1/php7.4.1.gz
/usr/bin/php8.0 - priority 80
slave php.1.gz: /usr/share/man/man1/php8.0.1.gzsudo update-alternatives --config php7. Symbolic Link (optional)
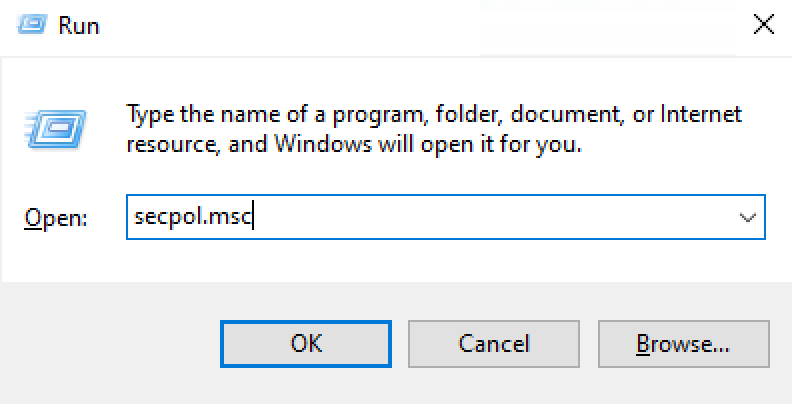
If there is an error message for symbolic link whle running the Laravel project, you will have to set up the rights for creating symbolic links for your user account. Run secpol.msc in Win+R.
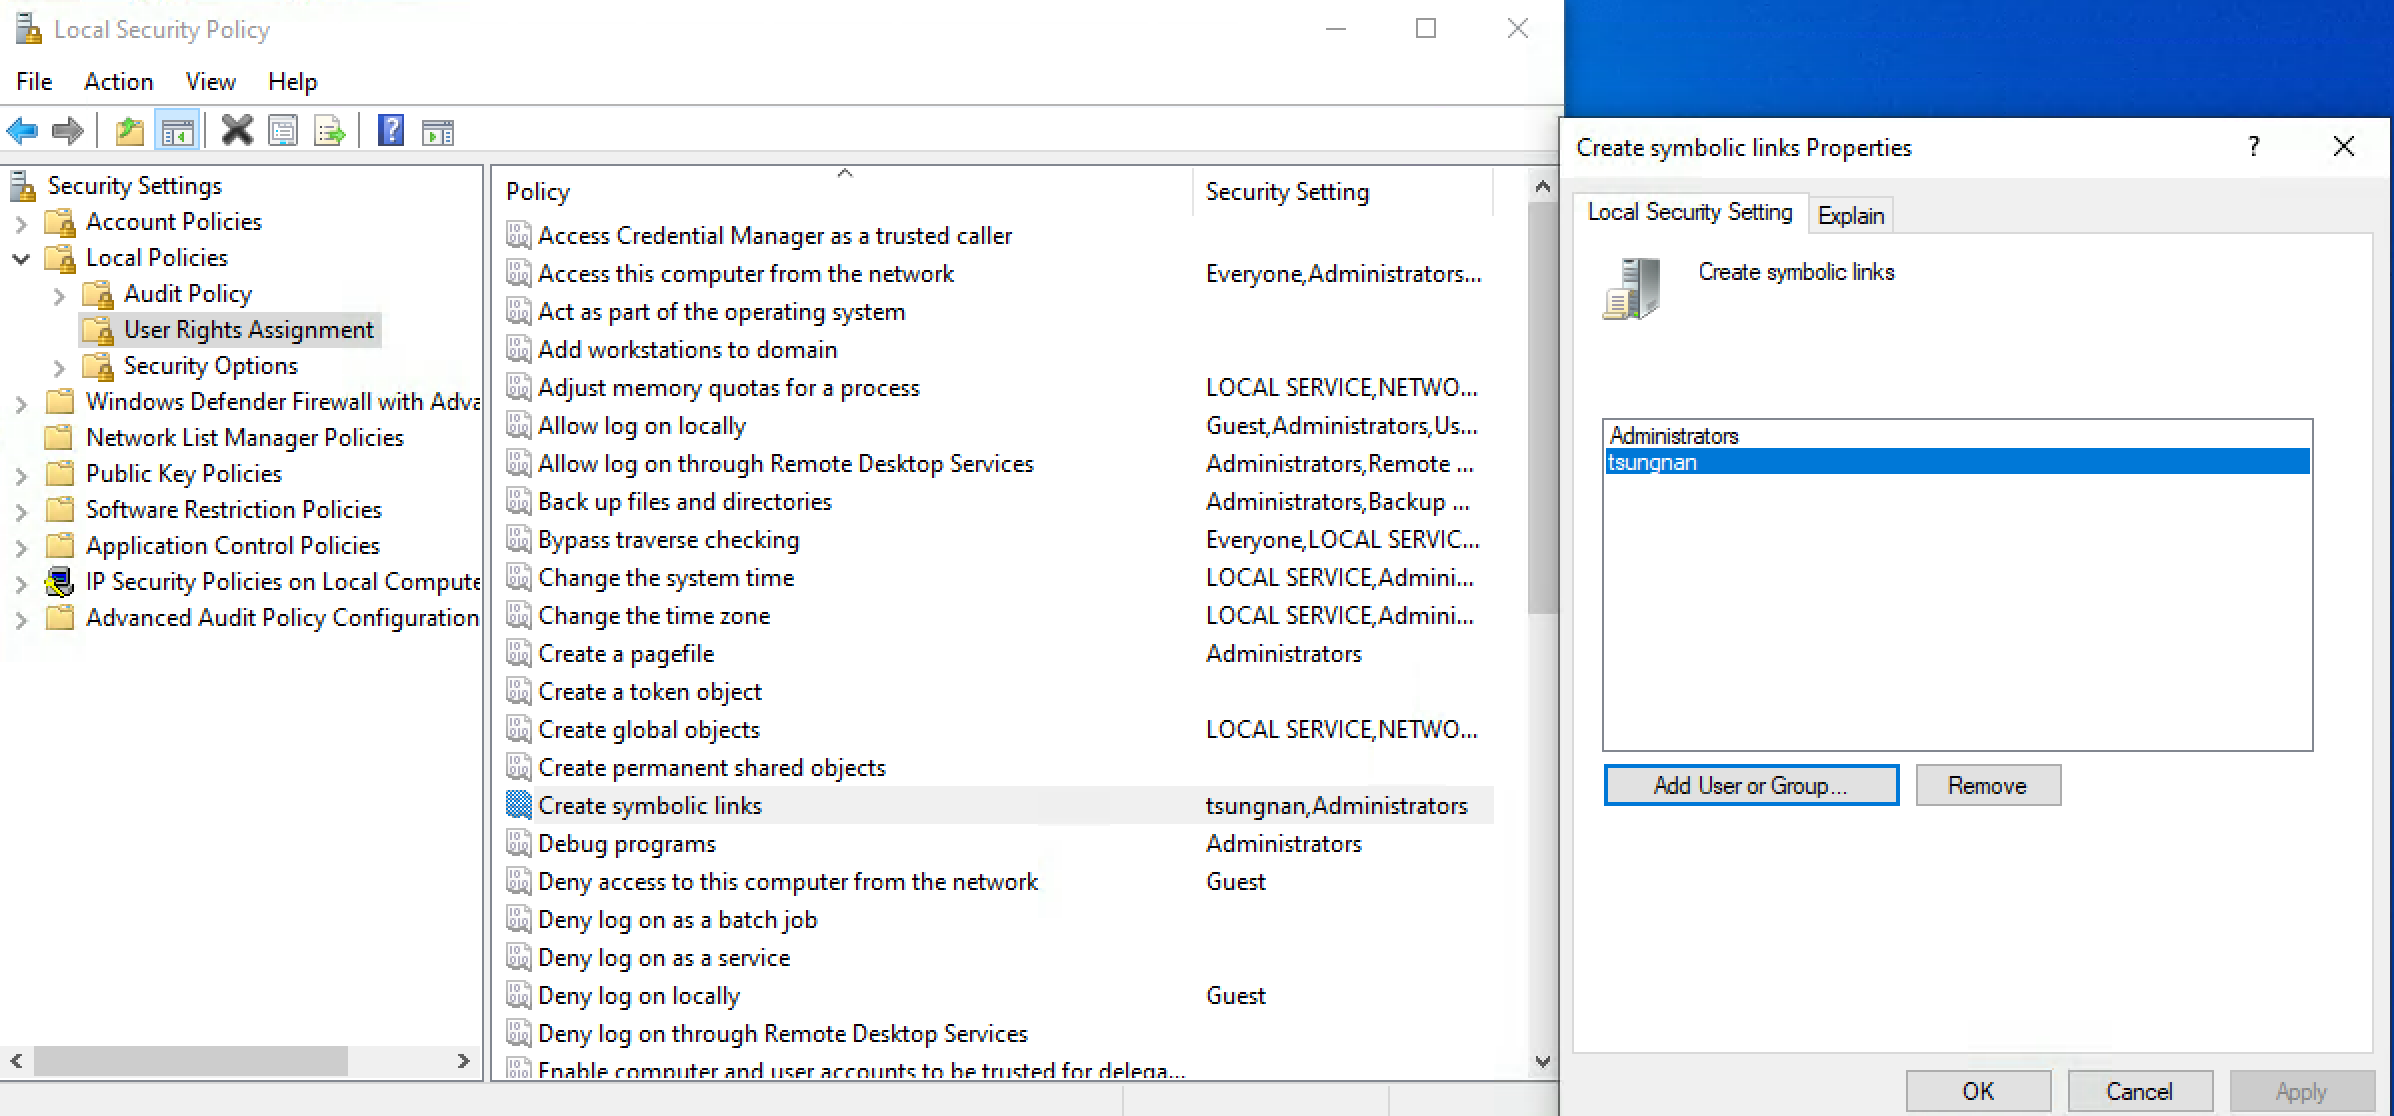
Go to Local Policies -> User Rights Assignment -> create symbolic links and add your user to this property.
8. MySQL Workbench (optional)
With MySQL Workbench, you can input the appropriate connection settings and use the GUI to design your database. The default settings of Homestead database can be found here: Connecting To Databases.

9. Starting up Homestead
Move the current working directory of git bash to Homestead and use the command vagrant up to start Homestead VM.$ vagrant up
Bringing machine 'homestead' up with 'virtualbox' provider...
==> homestead: Checking if box 'laravel/homestead' version '9.7.2' is up to date...
==> homestead: Clearing any previously set forwarded ports...
==> homestead: Clearing any previously set network interfaces...
==> homestead: Preparing network interfaces based on configuration...
homestead: Adapter 1: nat
homestead: Adapter 2: hostonly
==> homestead: Forwarding ports...
homestead: 80 (guest) => 8000 (host) (adapter 1)
homestead: 443 (guest) => 44300 (host) (adapter 1)
homestead: 3306 (guest) => 33060 (host) (adapter 1)
homestead: 4040 (guest) => 4040 (host) (adapter 1)
homestead: 5432 (guest) => 54320 (host) (adapter 1)
homestead: 8025 (guest) => 8025 (host) (adapter 1)
homestead: 9600 (guest) => 9600 (host) (adapter 1)
homestead: 27017 (guest) => 27017 (host) (adapter 1)
homestead: 22 (guest) => 2222 (host) (adapter 1)
==> homestead: Running 'pre-boot' VM customizations...
==> homestead: Booting VM...
==> homestead: Waiting for machine to boot. This may take a few minutes...
homestead: SSH address: 127.0.0.1:2222
homestead: SSH username: vagrant
homestead: SSH auth method: private key
homestead: Warning: Connection reset. Retrying...
homestead: Warning: Connection aborted. Retrying...
==> homestead: Machine booted and ready!
==> homestead: Checking for guest additions in VM...
==> homestead: Setting hostname...
==> homestead: Configuring and enabling network interfaces...
==> homestead: Mounting shared folders...
homestead: /vagrant => C:/Users/path
homestead: /home/path => C:/path
==> homestead: Detected mount owner ID within mount options. (uid: 1000 guestpath: /home/path)
==> homestead: Detected mount group ID within mount options. (gid: 1000 guestpath: /home/path)
==> homestead: Machine already provisioned. Run `vagrant provision` or use the `--provision`
==> homestead: flag to force provisioning. Provisioners marked to run always will still run.$ vagrant ssh
Welcome to Ubuntu 18.04.5 LTS (GNU/Linux 4.15.0-124-generic x86_64)
_ _ _
| | | | | |
| |__ ___ _ __ ___ ___ ___| |_ ___ __ _ __| |
| '_ \ / _ \| '_ ` _ \ / _ \/ __| __/ _ \/ _` |/ _` |
| | | | (_) | | | | | | __/\__ \ || __/ (_| | (_| |
|_| |_|\___/|_| |_| |_|\___||___/\__\___|\__,_|\__,_|
* Homestead v12.8.0 | Thanks for using Homestead
* Settler v11.5.0
* Canonical Livepatch is available for installation.
- Reduce system reboots and improve kernel security. Activate at:
https://ubuntu.com/livepatch
Last login: Wed Feb 17 06:14:06 2021 from 10.0.2.2
vagrant@homestead:~$Conclusion
Despite of the errors throughout these steps, I can now start to develop new functions for the website which is written Laravel and Voyager.History
Reference
- Installing Laravel Homestead On Windows Step By Step Procedure With Explanation
- How to change PHP version in homestead
- Removing packages
- Laravel PackageManifest.php: Undefined index: name
- Laravel 5.3 storage:link -> symlink(): Protocol error
- Laravel -- window 10 symlink(): Protocol error 问题处理
- creating symbolic link: Protocol error